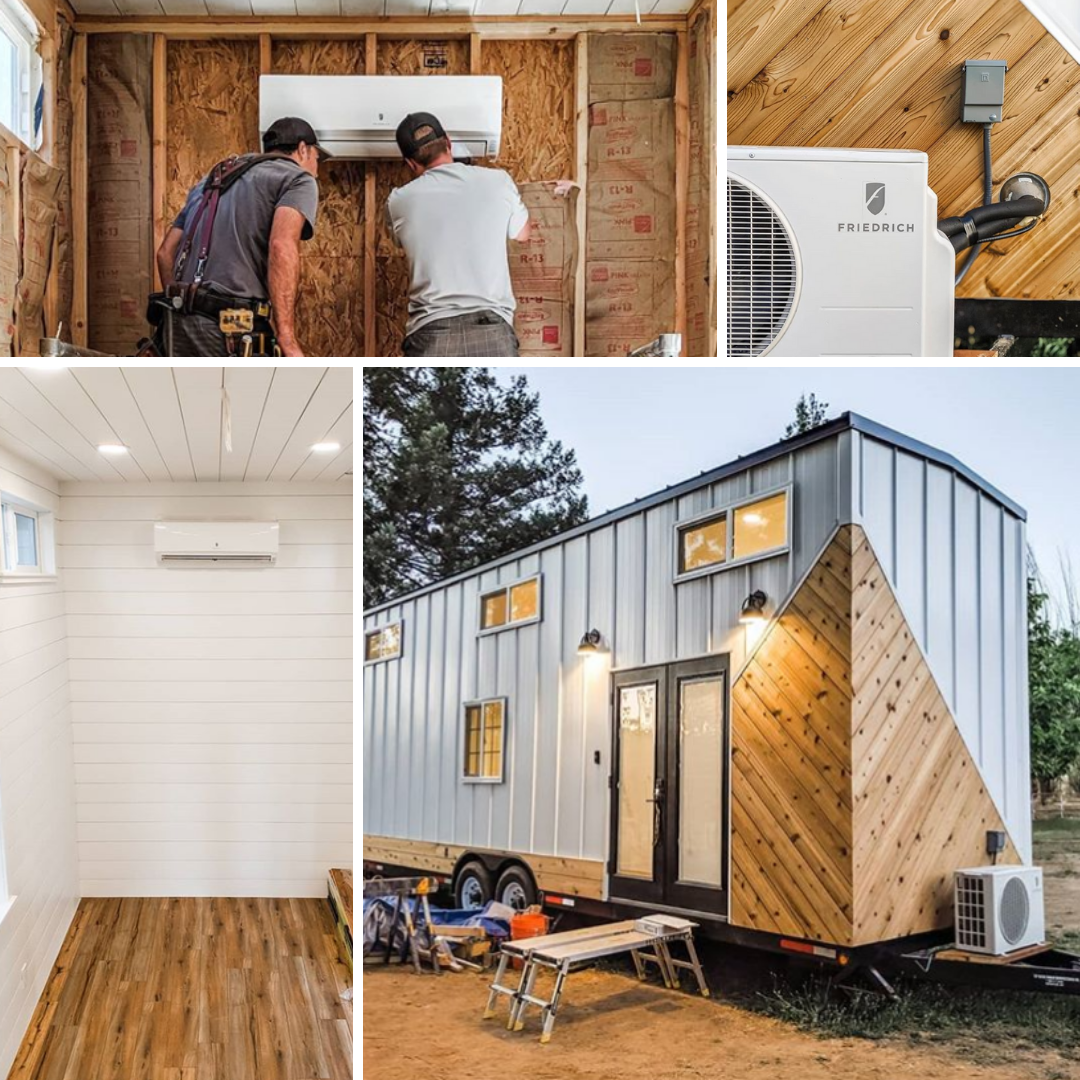
Multi-zone Ductless installations, when applied correctly, can heat or cool multiple spaces effectively. They may even present an easier installation than a traditional unitary system install when running ductwork seems almost impossible. When the situation presents itself, we must make sure that all bases are covered when designing and installing these Multi-zone systems. Here are a few tips and tricks to help better understand and apply Multi-zone Ductless to your next ductwork-impossible job.
- The Slippery Slope of Heating:Ductless units work on very tight superheat parameters, sometimes as low as 5°F. The logical calculation which positions the expansion valve and compressor throttle is designed to make sure your evaporator coil is constantly flooded for maximum cooling. But in the heating cycle, capacity will reduce as the temperature drops outside. The compressor and expansion valve will throttle to make sure all the liquid trapped inside the condensing coil makes its way back to the compressor. This process will reduce the capacity of the rated BTU output of the system. Not to worry though, as Friedrich provides the BTU capacity of your system beyond the AHRI ratings, all the way down to -4°F. So when your sizing your equipment as a primary form of heat, make sure your condensing unit has the capacity to meet your regions heating requirement stated on your Manual J load in correlation to your average winter lows.
Helpful Tip: Thinking “inside the box” may help overcome when sizing equipment in areas that experience beyond -4°F outdoor temperature. Building an enclosure too keep the sides, rear, and top free from cold arctic winds and snow may aide to help the system not go into defrost mode as often.
- The Trouble with Evaporator Location: Ideally, there are situations where the evaporator can sit perfectly in the center of an outside wall, making installation a breeze. I have had situations were obstructions (chimneys, for example) make it unlikely. Remember that our Friedrich Wall Mounted evaporates need at least 4” for proper air circulation around the ambient air sensor. So hugging an adjacent wall may be the solution to get a clear shot outside for linesets.
Helpful Tip: Our Floating Air Series ductless products have the ability to position the left/right supply air vanes with the press of a button on the wireless remote. When positioning a wall mounted evaporator close to the wall, direct the vanes with the remote to blow into the room. Directing airflow both up/down and left/right can be done with the wireless remote.
3. The Whole Mess of Drilling Holes: When drilling your 3” penetration, we all know that it should be pitched downward… but why? If drilled straight, the condensation hose may produce a “bump up” and cause improper drainage. This also occurs when the drain hose is sometimes routed above the lineset and presents a twist to the hose putting a halt to gravity drainage. Usually to correct, the bracket has to be raised slightly.
Helpful Tip: Our Floating Air ductless series mounting brackets come with a tape measure assist when drawing the lines for mounting and for drilling for your 3” hole. In fact, no tape measure is really required as the mounting plate is the mounting template!
- Communication Check and Wiring: Sometimes it gets confusing with all those pipes and wires tied into one outdoor unit. If not labeled, or labeled incorrectly, wires and pipes may become mixed. It is important to verify before startup that each lineset is traced to its coordinating power wire. Some tell-tale signs that wires may be crossed are freezing on “not calling” evaporators and no cooling on a “calling” evaporator. If putting all evaporates on “calling” seems to fix the issue, wires have most probably been crossed. If you suspect a faulty communication line, remember that all evaporates tie back to one condenser. For a condensing unit’s board to have a faulty communication circuit, all indoor evaporators will produce a communication error code. For systems with only a single unit of many giving a communication error, check your wiring or your indoor boards communication circuit.
Helpful Tip: A reverse continuity check can easily sort out bunched up wires. With all wires disconnected from all evaporators and the condensing unit, tie any pair of wires together in the same sheathing. Then, probe those color wires at each evaporator location with a meter on continuity. When the meter beeps, you know which wire goes to each evaporator. It’s simply a rule-out process for the rest.
Safe Journeys,
Peter Iodaci, Jr . - Director of Technical Management
.jpg)
